How to Clean Out a House: 7-Step Guide to a Complete Home Cleanout
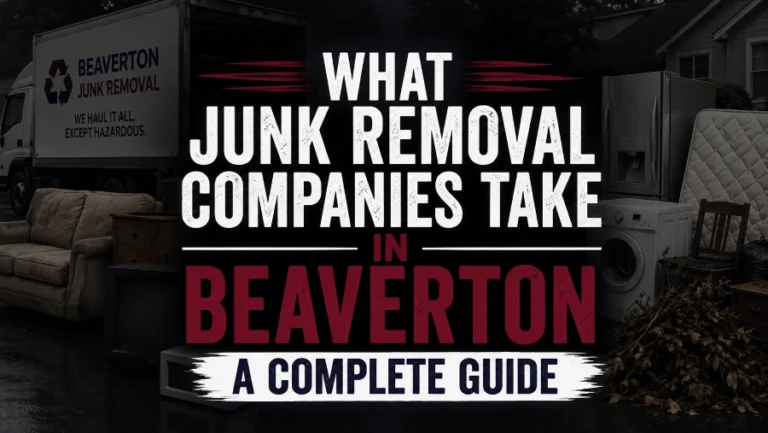
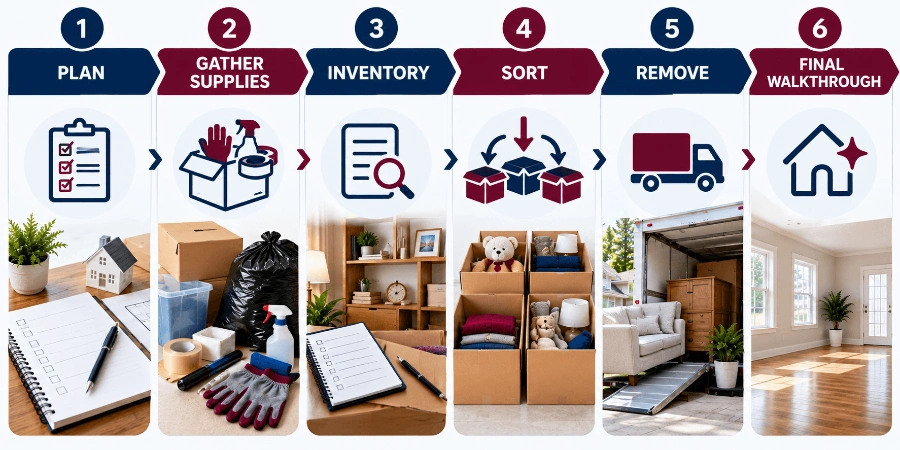
How to clean out a house starts with a clear plan. Decide what needs to leave, gather supplies, and work through each room. Sort belongings into keep, sell, donate, recycle, and discard categories, then remove unwanted items and complete a final walkthrough. For large cleanouts, professional removal can simplify the heavy work.
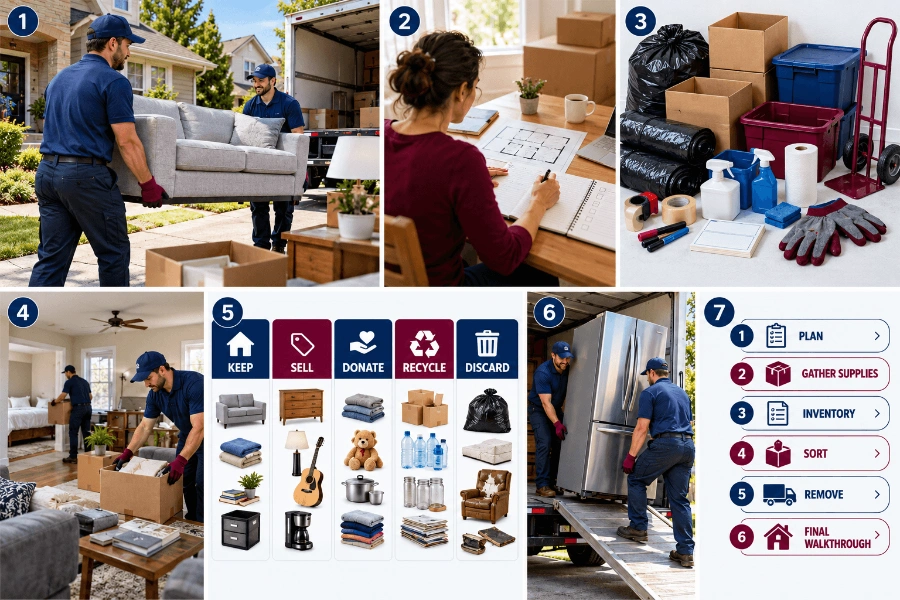
A son helping his mother prepare to move realizes the house is much fuller than either of them expected. The garage is packed with old tools, closets are overflowing with clothes, and every room seems to hold another box that needs a decision. Standing in the middle of it all, he wonders where to start and how to get through the house without becoming overwhelmed. That’s precisely what this guide is for.
Before You Start: Make a House Cleanout Plan
Before you begin, decide what you want to accomplish and how you will approach the property. How to clean out a house efficiently depends on having a clear plan before you start moving items from one room to another. A room-by-room plan can keep you from jumping between areas and repeatedly moving the same belongings.
Set Your Cleanout Goals
First, decide what you are trying to accomplish.
Your goal might be to:
- Empty the entire house before a move.
- Prepare a property for sale
- Downsize to a smaller home
- Clear an inherited house
- Remove years of accumulated belongings
- Prepare a rental property for the next tenant.
- Reclaim garages, storage rooms, attics, or basements
- Remove unwanted household items after a renovation.
Your goal determines how aggressively you need to sort and what should ultimately leave the property. For example, a family preparing to move may focus first on what is going to the new home, while a homeowner preparing to sell may prioritize excess furniture, boxes, and stored belongings that need to leave before the property is listed. An inherited home may require more time at the inventory stage so documents, photographs, valuables, and personal belongings are identified before anything is removed.
Decide What Needs to Leave the House
Before sorting individual belongings, establish a simple rule for the project.
For example:
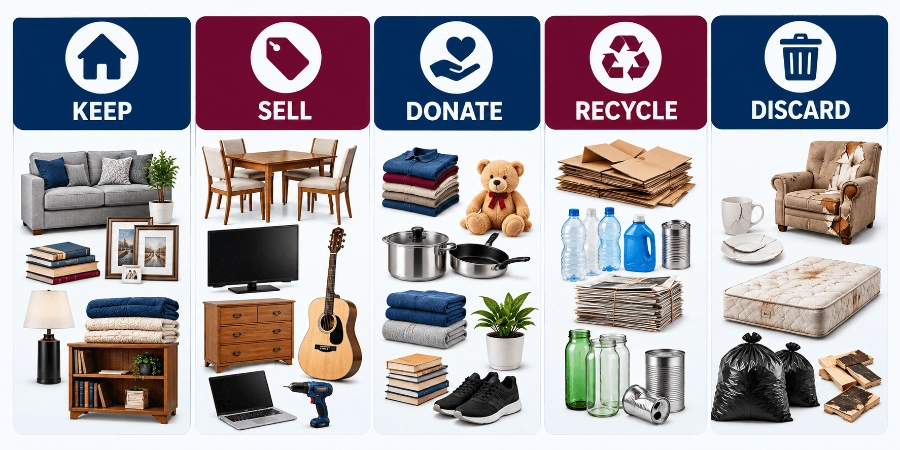
- Keep: Things that are needed, regularly used, or genuinely important.
- Sell: Items with enough value to justify the time and effort required to sell them.
- Donate: Usable items that someone else could reasonably use.
- Recycle: Materials and items that have an appropriate recycling option.
- Discard: Broken, damaged, contaminated, or otherwise unusable items that cannot reasonably be reused or recycled.
Having these categories ready makes decisions much faster once you start working through each room.
Make a Room-by-Room Plan
List every area that needs attention.
For example:
- Entryway
- Living room
- Kitchen
- Dining room
- Bedrooms
- Closets
- Bathrooms
- Laundry area
- Garage
- Basement
- Attic
- Shed
- Storage areas
- Yard or outdoor areas
You do not have to complete the entire house in one session. Finish one area before moving to the next whenever possible.

Set a Realistic Timeline
The size of the house is only part of the equation. The amount of stuff inside, the number of people helping, the amount of sorting required, and the destination of unwanted items can all affect how long the cleanout takes. Give yourself enough time to make decisions rather than creating a rushed pile of everything you are unsure about.
If other people are helping, decide in advance who is responsible for final decisions and who will handle boxing, labeling, carrying, or staging. This keeps several people from making conflicting decisions about the same belongings.
Gather the Supplies You Need
Having supplies ready before you begin prevents constant interruptions.
What supplies do you need to clean out a house? For a typical house cleanout, useful supplies include:
- Heavy-duty trash bags
- Cardboard boxes
- Storage bins
- Permanent markers
- Labels
- Packing tape
- Gloves
- Basic cleaning supplies
- A dolly or hand truck for appropriate heavy items
- Separate containers for documents or valuables
- A designated area for donation items
- A designated area for items that need recycling
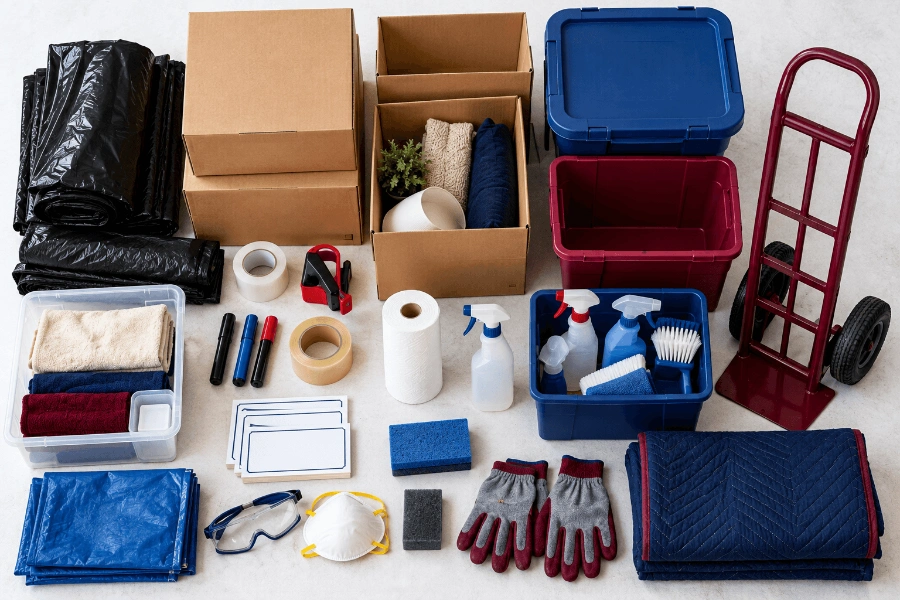
Label boxes or areas according to your sorting system.
For example:
KEEP → SELL → DONATE → RECYCLE → DISCARD
If you are learning how to declutter a house, keep documents, photographs, valuables, and sentimental belongings separate from the general sorting piles. Create clearly marked areas for items that are leaving the house, and keep donation, recycling, disposal, and selling piles separate. Keeping these piles in separate locations reduces the chance of sorting the same item more than once. For large items, keep a clear path from the item to the exterior so that furniture and appliances do not have to be moved around other piles.
Take Inventory Before You Start Sorting
Before removing large amounts of stuff, walk through the entire house.
Look inside:
- Closets
- Cabinets
- Drawers
- Attics
- Basements
- Garages
- Sheds
- Storage rooms
- Under beds
- Behind furniture
- Shelves
- Cabinets and cupboards
This prevents important belongings from being discovered after the cleanout is supposedly finished. If the property belongs to someone else or is being cleared after a major life event, pay particular attention to personal documents, photographs, financial records, keys, jewellery, family items, and other valuables before anything is discarded. Taking a few photographs before sorting can also help you remember how the property was arranged and document its condition before the cleanout begins.
Clean Out the House Room by Room
Once your plan and sorting system are ready, start working through the house. The key is to finish one area before moving randomly to another. A room-by-room approach helps make a large cleanout feel like a series of smaller projects rather than one enormous task.
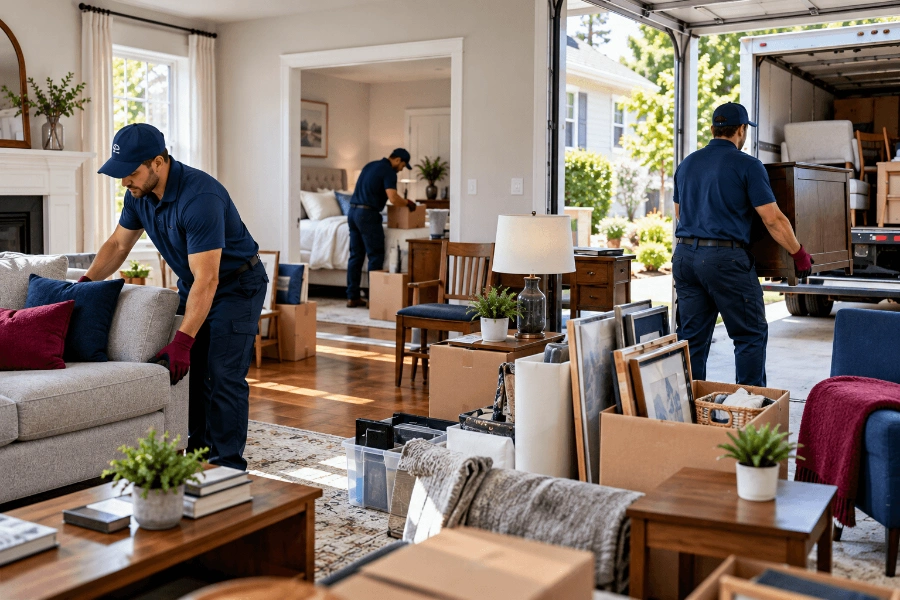
Kitchen
Start with the easiest items.
Remove:
- Expired food
- Broken dishes
- Unused kitchenware
- Duplicate utensils
- Damaged containers
- Old appliances you no longer need
- Unwanted cookware
- Excess pantry items
Then work through cabinets, drawers, counters, and storage areas.
Be careful with cleaning chemicals, batteries, old paint, and other potentially hazardous materials. These should not automatically go into regular household trash.
Living Room
Look at the room as a whole before sorting individual items.
Check:
- Sofas
- Chairs
- Coffee tables
- Side tables
- Books
- Electronics
- Decorations
- Lamps
- Rugs
- Shelving
- Boxes
- Storage furniture
Ask yourself whether each item is actually being used or whether it is simply occupying space.
Bedrooms & Closets
Bedrooms can contain years of accumulated clothing and personal belongings.
Work through:
- Clothing
- Shoes
- Bedding
- Dressers
- Nightstands
- Closets
- Storage boxes
- Personal items
Avoid creating a giant “maybe” pile that gets moved from room to room. If you are genuinely unsure about something, place it in a clearly labelled temporary area and return to it after the easier decisions are finished.
Bathrooms
Check:
- Cabinets
- Drawers
- Shelves
- Linen storage
- Old toiletries
- Broken accessories
- Unused household products
Pay particular attention to medications and chemical products. Disposal requirements can vary, so do not automatically place every old product into regular trash.
Garage, Attic & Storage Areas
These areas often require more physical work because they can contain bulky furniture, boxes, tools, equipment, appliances, and items that have accumulated for years.
Work in sections rather than pulling everything into one enormous pile.
For a garage, for example:
- Section 1: Tools
- Section 2: Household items
- Section 3: Furniture
- Section 4: Boxes
- Section 5: Recycling
- Section 6: Items for disposal
This keeps the project manageable and leaves you with usable pathways.
Sort Everything Into Keep, Sell, Donate, Recycle & Discard
Sorting is the heart of a house cleanout.
Use the same categories throughout the house so you do not have to reinvent your decision-making process in every room.
What to Keep
Keep items that are:
- Regularly used
- Necessary
- Valuable
- Sentimental
- Difficult or expensive to replace
- Important for the next home or stage of life
Avoid keeping something simply because you have owned it for a long time.
What to Sell
Selling makes sense when an item has enough value to justify the effort involved.
Potential examples include:
- Quality furniture
- Collectibles
- Tools
- Certain appliances
- Antiques
- Electronics in good condition
- Specialty equipment
Consider the time involved in photographing, listing, answering messages, negotiating, and arranging pickup. If selling an item will create weeks of work for a small return, donating or recycling it may be more practical.
What to Donate
Usable items in good condition may be suitable for donation.
Common examples include:
- Furniture
- Clothing
- Books
- Household goods
- Kitchen items
- Certain appliances
- Toys
- Décor
Donation and reuse can keep usable items from becoming waste. The EPA also recommends considering reuse and donation for unwanted household goods when appropriate. (EPA)
What to Recycle
Recycling depends on the material and the local program.
Potential recyclable materials may include:
- Cardboard
- Certain metals
- Some electronics
- Eligible appliances
- Other materials accepted by local recycling programs
Do not assume that everything with a recycling symbol belongs in curbside recycling. Check the applicable local program for items that require special handling.
What to Discard
Discard items that are genuinely unusable and cannot reasonably be donated, sold, or recycled.
Examples may include:
- Broken household items
- Damaged furniture
- Unusable household goods
- Contaminated materials
- General non-recyclable junk
The goal is not to throw away everything quickly. The goal is to make a clear decision about where each category belongs.
How to Handle Large and Heavy Items
Large items can turn a simple cleanout into a difficult physical project.
Examples include:
- Sofas
- Mattresses
- Large cabinets
- Tables
- Appliances
- Exercise equipment
- Heavy boxes
- Large shelving
- Oversized furniture
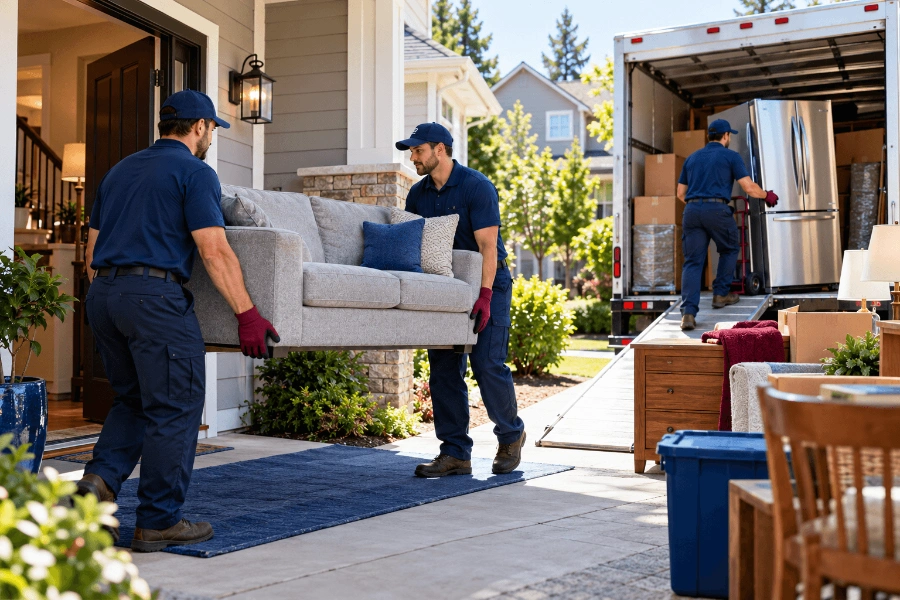
Before moving something heavy, consider its weight, size, path through the house, stairs, doorways, and where it will ultimately go. Measure tight doorways or turns when a bulky item may be difficult to maneuver, and clear the route before lifting. Do not attempt to move an item that you cannot safely control.
For appliances and other speciality items, disposal or recycling requirements may also apply. Refrigerators, freezers, and other refrigerant-containing appliances can require proper refrigerant handling before recycling or disposal. (EPA)
If a large item requires multiple people, specialised equipment, or a difficult route through the property, professional removal may be the safer option.
What Should You Do With Items You Cannot Keep
Once you have finished sorting, you still need a plan for everything leaving the house.
Donate Usable Items
Set donation items aside in one clearly marked location. Do not mix them back into general trash or removal piles.
Sell Valuable Items
Group sellable items together so you can photograph and list them efficiently. Set a deadline for selling them. Otherwise, “items to sell” can become another permanent storage pile.
Recycle Eligible Materials
Separate materials according to the recycling options available in your area. Electronics, batteries, appliances, metals, and other speciality materials may have different requirements.
Dispose of Unwanted Items
General unwanted items that cannot be reused or recycled may need to go through appropriate disposal channels. Local disposal rules vary, so check the applicable waste-management requirements before loading everything into a regular trash container.
Handle Hazardous or Special Items Separately
This is one area where you should slow down rather than simply throwing things away.
Household hazardous waste can include products such as paints, cleaners, oils, batteries, pesticides, and similar materials. The EPA advises following local disposal requirements rather than putting these materials in ordinary trash, drains, or on the ground. (EPA)
Electronics can also contain potentially hazardous substances and may require appropriate recycling or collection. If you are unsure about an item, check with the appropriate local waste or recycling authority before disposing of it.
How to Clean Out a House Quickly
If you need to clean out a house in one day, work room by room and avoid spending too long on individual decisions. If you only have an hour or two, prioritize trash, unwanted items, and high-use areas before handling smaller tasks.
Start With Obvious Decisions
Do not spend 20 minutes deciding what to do with one old decoration. Begin with obvious trash, obvious donations, obvious recycling, & obvious items you want to keep.
Work One Room at a Time
Avoid carrying items from five rooms into one giant sorting pile. Finish one zone before moving to the next.
Use Clearly Marked Categories
Keep your sorting system consistent:
Keep → Sell → Donate → Recycle → Discard
Get Help With Decisions
If several family members have a claim to belongings, decide who has authority to make final decisions before the cleanout begins.
Separate Physical Work From Decision-Making
If possible, one person can make decisions while another person boxes, labels, carries, or stages items.
Deal With Large Items Early
Large furniture and appliances take up valuable working space. Once you have decided that an item is leaving, move it into the appropriate removal area when it is safe to do so.
Do Not Create a Giant, Maybe Pile
A temporary “maybe” category can be useful, but it should have a deadline. Otherwise, you may simply move the same items around the house without actually completing the cleanout.
Finish the Cleanout With a Final Walkthrough
Do not consider the house finished immediately after the last load leaves.
Walk through the entire property one more time.
Check:
- Closets
- Cabinets
- Drawers
- Attic
- Basement
- Garage
- Shed
- Storage rooms
- Behind doors
- Under beds
- Inside appliances where appropriate
- Exterior areas
Look for documents, valuables, personal belongings, and anything that was accidentally left behind. Once everything has been removed, you can move on to the cleaning stage.
If the property is being prepared for sale, rental, renovation, or handover, the final walkthrough is also a good time to identify repairs or cleaning that still need attention.
House Cleanout Checklist
Use this quick checklist before you begin:
Planning
- Decide why you are cleaning out the house.
- Set a deadline
- List every room and storage area.
- Decide who will make final decisions.
- Create your sorting categories.
Supplies
- Heavy-duty trash bags
- Boxes
- Storage bins
- Labels
- Permanent markers
- Packing tape
- Gloves
- Basic cleaning supplies
Sorting
- Keep items
- Sell items
- Donate items
- Recycle items
- Discard items
- Separate hazardous or speciality items
Important Items
- Documents
- Financial records
- Photographs
- Jewelry
- Keys
- Valuables
- Personal belongings
Final Walkthrough
- Check closets
- Check cabinets and drawers
- Check attic
- Check basement
- Check garage
- Check shed
- Check storage areas
- Check outdoor areas
- Remove remaining unwanted items.
- Complete final cleaning
When Should You Consider Professional Help?
A DIY house cleanout can make sense when the project is relatively small, you have enough time, you have transportation, and you have people available to help with the physical work.
Professional help may make more sense when:
- Multiple rooms are filled with unwanted items.
- The property contains large furniture.
- Appliances need to be removed
- There are mattresses or other bulky items.
- The garage, attic, or basement is heavily packed.
- You have limited time.
- You do not have a suitable vehicle.
- Heavy lifting would be difficult.
- The project requires multiple disposal or recycling trips.
Professional removal can reduce the physical work and transportation burden involved in a cleanout. If you are doing the sorting yourself, you can still use professional removal for the items you have already decided need to leave.
Frequently Asked Questions
Start by separating the contents into keep, sell, donate, recycle, and discard categories. Work room by room instead of trying to empty the entire house at once. Once everything is sorted, arrange the appropriate donation, recycling, disposal, or junk-removal option for each category.
Start by making a plan rather than immediately removing items. Walk through the property, identify every room and storage area, gather supplies, and establish your sorting categories. Then begin with one manageable room or zone.
There is no single timeline for every house cleanout. The amount of belongings, number of rooms, amount of sorting required, available help, access, transportation, and disposal arrangements can all affect the time required. A small cleanout may be manageable in a short period, while a heavily furnished whole-house project can take considerably longer.
Keep items you need or genuinely value. Sell items with enough value to justify the effort. Donate usable items in appropriate condition. Recycle materials accepted by local programs. Discard items that are unusable and cannot reasonably be reused or recycled.
Start by securing important documents, valuables, photographs, and personal belongings before removing anything. Then work through the house room by room, separating items into keep, sell, donate, recycle, and discard. Give family members or the estate representative time to identify important items, and follow local disposal requirements for hazardous materials, electronics, and appliances.
Start with the most visible clutter, then work through one area at a time. Put items back where they belong, remove obvious trash, and focus on high-use areas first. If you are also doing a full house cleanout, sort unwanted belongings into keep, sell, donate, recycle, and discard as you go.
Final Takeaway
The simplest way to clean out a house is to plan first, sort systematically, and remove items in stages. Start with one room and separate belongings into keep, sell, donate, recycle, & discard. Handle large or specialty items carefully, follow local requirements for hazardous materials, and finish with a complete walkthrough. How to clean out a house successfully comes down to breaking the project into small, manageable tasks.
Need Help With a House Cleanout?
If the cleanout is too large to handle yourself, our Beaverton house cleanout service can help with furniture, appliances, household items, and other unwanted contents.
House Cleanout Progress Tracker
What are you doing with the items?
What are you doing with the items?
What are you doing with the items?
What are you doing with the items?
What are you doing with the items?
What are you doing with the items?
What are you doing with the items?
What are you doing with the items?
What are you doing with the items?
What are you doing with the items?
What are you doing with the items?
What are you doing with the items?
What are you doing with the items?
| Category | Items | |
|---|---|---|
| KEEP | 0 | |
| SELL | 0 | |
| DONATE | 0 | |
| RECYCLE | 0 | |
| DISCARD | 0 |
0 / 13 areas completed
0%
You have completed 0 of 13 areas.
0% complete
- Keep: 0
- Sell: 0
- Donate: 0
- Recycle: 0
- Discard: 0